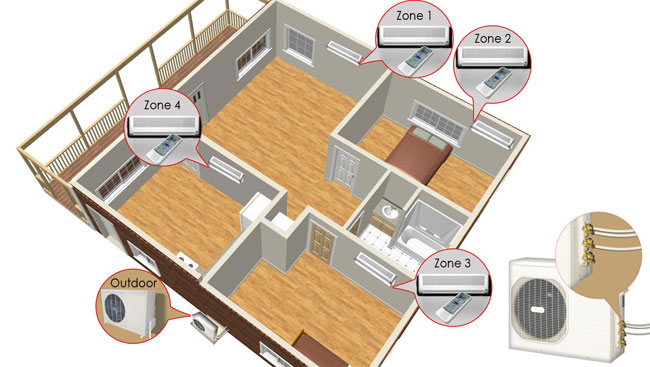
The ductless mini-split system
8 Steps We Recommend
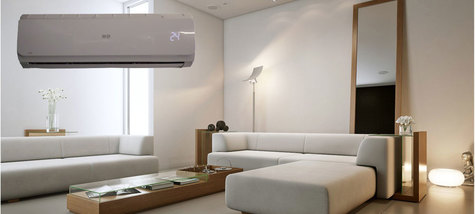
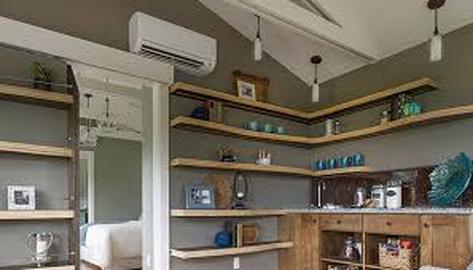
1. Choose an area on an interior wall inside of the home that is at least seven feet above the ground to mount the indoor air unit. Avoid areas where there is direct exposure to sunlight, heat, and gas. Make sure there is at least six inches of open space surrounding the top and bottom of the unit or else your system is going to require extra home ac maintenance.
2. Use the level tool to check the position of the mounting plate to ensure that it is properly square. Use the drill to place holes for the plastic anchors for the mounting plate. Insert the anchors into the drill holes and use tapping screws to attach and secure the mounting plate to the wall.
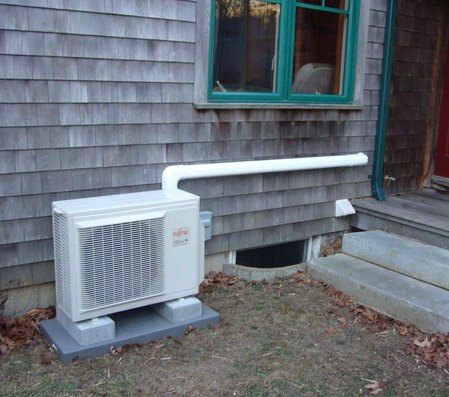
3. Determine the length of pipe that is needed to reach the outside condenser unit from the inside of the home. Choose a location on the interior wall to drill or saw a three to four inch hole in the wall for the piping lines to run towards the exterior wall based on the hole on the mounting bracket.
4. To provide for proper drainage, the hole should slope down towards the exterior wall. After the hole is complete, place a flexible flange into the hole.
5. Inspect the electrical connections and components on the mini-split system. Use the manufacturer’s diagram to make sure that all wires and cables are properly connected to the appropriate terminals.
6. Run the piping from the indoor unit through the hole in the wall. Avoid bending the piping to prevent potential operations problems. Take a fourth inch length of PVC pipe and place a pipe cap on the interior end. Run the PVC pipe through the hole in the wall towards the exterior wall. Mesh the copper and drain pipes, along with the power cables together with electrical tape. Make sure the drainpipe is in the bottom position to enhance draining capabilities.
7. Attach the pipe securely to the indoor air unit. This can be accomplished by using two wrenches and working them in opposite directions at the same time to tighten the connectors. Attach the water drainpipe to the indoor air unit’s base. Run the pipes and conduits through the hole in the interior wall towards the exterior wall. Double check the drainpipe to ensure that it is draining in an appropriate place.
8. Press the indoor air unit against the mounting plate and make sure it is secure.
2. Use the level tool to check the position of the mounting plate to ensure that it is properly square. Use the drill to place holes for the plastic anchors for the mounting plate. Insert the anchors into the drill holes and use tapping screws to attach and secure the mounting plate to the wall.
3. Determine the length of pipe that is needed to reach the outside condenser unit from the inside of the home. Choose a location on the interior wall to drill or saw a three to four inch hole in the wall for the piping lines to run towards the exterior wall based on the hole on the mounting bracket.
4. To provide for proper drainage, the hole should slope down towards the exterior wall. After the hole is complete, place a flexible flange into the hole.
5. Inspect the electrical connections and components on the mini-split system. Use the manufacturer’s diagram to make sure that all wires and cables are properly connected to the appropriate terminals.
6. Run the piping from the indoor unit through the hole in the wall. Avoid bending the piping to prevent potential operations problems. Take a fourth inch length of PVC pipe and place a pipe cap on the interior end. Run the PVC pipe through the hole in the wall towards the exterior wall. Mesh the copper and drain pipes, along with the power cables together with electrical tape. Make sure the drainpipe is in the bottom position to enhance draining capabilities.
7. Attach the pipe securely to the indoor air unit. This can be accomplished by using two wrenches and working them in opposite directions at the same time to tighten the connectors. Attach the water drainpipe to the indoor air unit’s base. Run the pipes and conduits through the hole in the interior wall towards the exterior wall. Double check the drainpipe to ensure that it is draining in an appropriate place.
8. Press the indoor air unit against the mounting plate and make sure it is secure.
What comes with a ductless mini-split system?
There are many brands/manufacturers of ductless mini-split systems on the market to choose from, but the one thing each ductless system has in common is affordability, compact design, and easy installation/maintenance. We recommend any air conditioning system from Mitsubishi.
A ductless mini-split system consists of an outdoor condenser, compressor, wall mounted air handler and a remote control with multiple features such as a sleep setting, timer and automatic shutoff. The entire unit provides an economical alternative to heat pump or packaged HVAC systems along with high performance, quiet operation and superior energy efficiency.
Tips to Remember:
- Avoid placing the air handler in direct sunlight.
- Avoid placing the unit near any heat sources.
- The air handler needs to be in a location that provides optimum circulation, minimal operating noise and optimal drainage.
- Do not place the air handler anywhere near or around a doorway.
- Avoid placing the air handler near any furniture, wall hangings, or other accessories or obstacles that could interfere with or block circulation.
